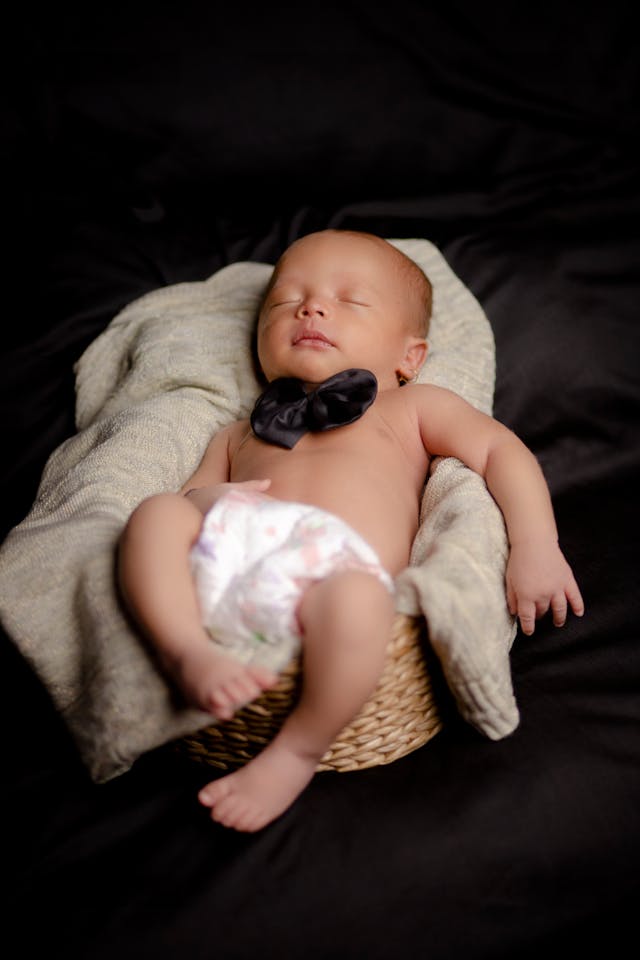
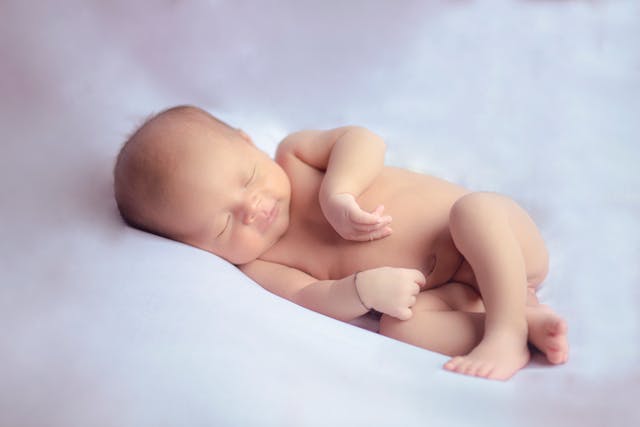
Newborn photography is not just about clicking pictures; it’s an art form that captures the essence of a baby’s earliest moments. Ideal between six and ten days, yet extendable up to six weeks old, newborn photography cherishes the fleeting newness of a baby, emphasizing tiny details like the softness of hair, the curves of tiny fingers, and the delicacy of toes. It stands as a precious opportunity to seize life’s genuine, unrepeatable moments, making it crucial for parents wanting to preserve the infancy of their beloved newcomer. Moreover, by incorporating a mix of posed and lifestyle shots, it caters to various preferences, offering a diversity that enriches the album of newborn photos.
As you venture into capturing these newborn shots or planning a baby photoshoot, understanding the distinctive styles—lifestyle, which emphasizes candid, natural settings, and posed, focusing on meticulous setups and lighting—is paramount. This guide navigates you through the essentials of newborn photography, from selecting the appropriate gear, preparing for the baby photo session, to perfecting infant photography poses safely. The journey through mastering newborn photography is not just about acquiring skills but also about creating memories that are cherished for a lifetime.
Understanding the Basics of Newborn Photography
Understanding the basics of newborn photography means diving into aspects that ensure the photos turn out beautifully while keeping the little ones safe and comfortable. Here’s a breakdown to get you started:
Lighting and Environment:
- Use natural light and avoid flash to keep the baby comfortable and to capture the softness of their features.
- Position newborns near windows for soft lighting, resulting in even illumination and natural texture.
- Keep the background simple to ensure the focus remains on the baby, enhancing the photo’s natural and realistic feel.
Safety and Preparation:
- Techniques and Styles:
- There are two main styles: posed and lifestyle. Posed involves professional portraits in a studio, while lifestyle is more candid.
- Capture close-up shots of tiny details like fingers and toes to preserve the fleeting moments of a newborn’s life.
- Experiment with black-and-white photos to add emotional depth and draw attention to details, making the newborn photos stand out.
- Safety is paramount. Ensure you’re fully vaccinated and have completed an Infant/Baby Safety and CPR class.
- Learn safety skills through in-person mentoring, online courses, and baby conventions to handle newborns correctly.
- Schedule the photo session when infants are between 5 to 14 days old, as this time frame allows for peaceful, uninterrupted shots.
Remember, mastering newborn photography isn’t just about picking up a camera; it requires understanding how to create a safe and comfortable environment for the baby, choosing the right techniques, and knowing the best time for the photoshoot. Always consider learning from accredited workshops to gain a certified certificate or recognized qualification, ensuring you’re well-equipped to capture these precious moments.


Selecting the Right Equipment and Setting
Selecting the right equipment and setting for your newborn photography session can make a world of difference in the quality and feel of the newborn photos. Here’s a simple guide to get you started:
Ideal Locations for the Photoshoot:
- Nursery, Living Room, and Parents’ Bedroom: These rooms often provide the best settings for a newborn photoshoot due to their personal and intimate nature.
- Natural Light: Aim for rooms with ample natural light and open blinds to create soft, flattering lighting.
- Time of Day: Schedule your session during daylight, preferably in the morning hours between 9 AM – 2 PM, when the light is most suitable for photography.
Setting Up the Scene:
- Decluttering: Keep the space tidy by removing unnecessary items, but don’t stress about deep cleaning. The focus will be on the baby, not the surroundings.
- Safety First: Ensure all lights are turned off and wires are hidden to maintain a safe environment for the baby.
- Backdrop and Props: Use neutral-colored backdrops and props to avoid distraction and to complement the baby’s delicate features. Swaddles, wraps, and soft, clean, non-toxic props can help in creating beautiful poses and adding interest.
Choosing the Right Equipment:
- Camera: DSLR and mirrorless cameras are recommended for their quality and versatility. The Canon R5, R6, and the budget-friendly Canon R50 are great options.
- Lenses: Opt for lenses that offer sharp images and a nice depth of field, such as the 100mm 2.8L Macro Lens for close-ups, and the 50mm 1.2L for portraits.
- Lighting: Soft light is key. If natural light isn’t sufficient, consider continuous lights with softboxes or LED panel lights that allow for adjustable light levels.
- Accessories: Don’t forget about the smaller details such as backdrop stands, clips, newborn posing pillows, and a warm, cozy environment to keep the baby comfortable.
Remember, the goal is to capture the newborn in the most natural and comfortable way possible. With the right setting and equipment, you’re well on your way to creating beautiful, memorable newborn photos.
Preparing for the Photoshoot
To ensure a smooth and successful newborn photography session, a little preparation goes a long way. Here’s how you can get ready:
Before the Photoshoot:
- Timing is Everything:
- For those serene sleeping baby photos, aim to schedule the session within the baby’s first 14 days.
- If you’re hoping to capture more awake moments, consider setting the date after the baby hits the four-week mark.
- Feed and Awake Time:
- Keep your baby awake for 30 to 60 minutes before the session if you’re aiming for asleep newborn photos.
- A full belly leads to a happy baby. Make sure to feed your little one right before the photoshoot.
During the Photoshoot:
- Comfort and Safety:
- The baby’s safety should always come first. Ensure the room is warm and cozy, and never leave the baby unattended on a prop.
- It’s all about timing. Take breaks as needed for feeding, cuddling, and any necessary clean-ups.
- Clothing and Props:
- Coordinate with your photographer about clothing choices and have at least three outfit options ready for the newborn.
- Use dedicated newborn photography cushions or props beds for added safety and comfort.
Additional Tips:
- Communication is Key:
- Share your vision and ideas with the photographer beforehand to ensure they capture the shots you’re dreaming of.
- Warmth and Atmosphere:
- Prepare the room by heating it up at least an hour before the photoshoot. A warm environment keeps newborns comfortable.
- Consider using white noise machines to mimic womb noises, providing a soothing effect for the baby.
By following these guidelines, you’re setting the stage for a successful newborn photography session that captures those precious early moments in the most beautiful and safe way possible.
Mastering Newborn Poses Safely
When you’re ready to dive into newborn photography, mastering safe and adorable poses is key. Here’s a breakdown of some popular poses and tips to ensure safety and comfort for the little ones:
Popular Newborn Poses:
- Tushie-up: Baby lies on their back with legs bent towards their chest, bottom slightly raised. It’s a cute pose that highlights the baby’s tiny features.
- Chin on Hands: Requires the baby to be in deep sleep for a peaceful look, with hands placed under their chin while lying on their back.
- Side-Lying: Offers versatility with the baby either naked, fully wrapped, or partially wrapped, allowing hands and feet to peek out.
- Wrapped on Fur: A snug wrap while the baby lies on soft fur, providing a cozy and serene image.
- Family and Parent Photos: Essential for capturing the bond between the newborn and their family, with poses ranging from the baby being held by parents to lying next to siblings.
Safety Tips for Newborn Poses:
- Choosing the Right Pose:
- Consider the baby’s comfort and safety first. Newborns are most cooperative and sleepy within the first two weeks, making it the best time for posed shots.
- Start with simpler poses like the Tushie-up or Wrapped Pose, as babies tend to love these and settle quickly. These poses also require minimal movement and adjustment.
- Communicate with parents about their preferences and ensure they are comfortable with the poses planned, especially for poses like the Tushy Up Pose, where parental approval is crucial.
- Always have a spotter or parent close by to monitor and assist with the baby during the photoshoot.
- Use posing pillows under blankets for proper positioning, ensuring the baby’s head, neck, and back are supported, especially in poses like Bum Up/Tushy Up.
- For more complex poses like the Froggy, use Photoshop composites for safety. This involves taking separate shots with the baby’s hands supported and combining them in post-production.
By focusing on these popular poses and adhering to safety guidelines, you can create beautiful, timeless newborn photos while ensuring a safe and comfortable experience for everyone involved. Remember, practice makes perfect, and building confidence in these poses will lead to stunning newborn photography.
Capturing the Perfect Shot
In capturing the perfect shot during a newborn photography session, there are several key elements to consider that can make a significant difference in the outcome of your newborn photos. Here’s a breakdown of some essential tips:
Lighting and Composition:
- Aim for natural light as much as possible, ensuring it illuminates the baby’s face gently. Avoid lighting the baby from below as this can create unnatural shadows.
- Check for a soft shadow under the baby’s nose to confirm the lighting is correct, enhancing the natural beauty of the newborn.
- Consider slightly overexposing your images to achieve soft, creamy, and bright skin tones that highlight the baby’s features.
Setting the Scene:
- Engagement and Variety:
- Take your time and be patient; newborn sessions can last 3-4 hours, allowing ample time for soothing, feeding, and changing poses.
- Document unique details like tiny toes, fingers, and the softness of the baby’s hair to capture the essence of their newness.
- Encourage family participation for a variety of shots. Including siblings and parents can result in some of the most cherished photos.
- Explore different angles by walking around the baby, and don’t rush to change setups. Sometimes, the best shots come from unexpected angles and moments.
- Keep the shooting area comfortably warm to ensure the baby remains asleep and content.
- Utilize white noise to mimic the womb’s environment, helping to keep the baby calm and asleep throughout the session.
- Ensure the baby has been fed prior to the session; a full belly makes for a happier, more cooperative subject.
Remember, the key to capturing the perfect newborn shot lies in preparation, patience, and the ability to adapt to the baby’s needs. By focusing on creating a calm, warm environment and using natural light effectively, you can achieve beautiful, timeless newborn photos that families will treasure forever.
Editing Your Newborn Photos
Editing your newborn photos can transform good shots into unforgettable memories. Here’s how you can polish those newborn photos with some effective editing techniques:
Basic Adjustments for a Soft Look:
- Smooth Skin Tones: Lowering contrast and clarity in Lightroom can help achieve a creamy effect on the baby’s skin, making it look soft and smooth.
- Correcting Skin Tones: Use the HSL sliders to adjust skin tones, removing any redness or unwanted color casts. This step is crucial for maintaining natural-looking skin.
- Creating Consistency: Ensure your photos have a consistent white balance to make your newborn gallery look cohesive. Adjust the magenta levels as needed to hit the right balance.
Advanced Techniques for Flawless Images:
- Presets and Actions for Efficiency:
- Presets: Save your favorite edits as presets in Lightroom. This not only speeds up your editing process but also ensures a consistent look across all images. The Bella Baby Newborn Preset Collection is a great starting point, but remember to tweak them as necessary.
- Photoshop Actions: Utilize the ‘All-in-One’ action for creating adjustable layers, allowing for detailed fine-tuning. Adjust the ‘Lighten Reds’ layer to manage red skin tones effectively. For adding warmth or defining light and shadow, the ‘Warm Wash’ and ‘Definition Night and Day’ actions can enhance your photos significantly.
- Skin Perfection: For smoothing out skin, Lightroom is your go-to. This keeps the process simpler and avoids the complexity of Photoshop. However, if you encounter tougher skin tone issues, the ‘Serum’ action in Photoshop can be a lifesaver.
- Sharpening Details: Sharpen your images as the final step to avoid overdoing it. Adjust the sharpening settings based on your camera’s settings and the ISO used during the shoot.
- Texture and Tone Adjustments: Use the ‘Texture Scrub’ and ‘Skin Tone’ actions in Photoshop to fine-tune the texture and even out skin tones, adding back any texture lost during the smoothing process.
By following these steps and using the right tools, you can ensure your newborn photography not only captures the moment but does so with the beauty and softness these memories deserve. Remember, the goal is to enhance the photos while keeping them looking natural and true to the moment.
Final Remarks
Venturing into the world of newborn photography is a journey filled with the joy of capturing life’s tender beginnings. Through this guide, we’ve explored the essentials of capturing those precious, fleeting moments of infancy, emphasizing the importance of safety, the magic of natural light, and the art of creating a comfortable environment for both the newborn and the family. Mastering the craft is not just about the technical aspects, like selecting the right gear or mastering post-editing techniques, but also about understanding the significance of these moments and preserving them in their most genuine form.
As we conclude, remember that each baby photoshoot presents an opportunity to create something truly unique and timeless. By integrating the tips and insights provided, you’re well on your way to not only sharpening your skills but also ensuring that the families cherish these memories for a lifetime. For those keen to expand their horizons, feel free to explore other blog posts and check our photography shirts and products, enriching your journey with more resources and inspiration. Let these captured moments serve as a reminder of the beauty of life’s beginnings, encouraging us all to appreciate the delicate details that make each newborn so special.
FAQs
What are the essential skills for a newborn photographer?
To excel in newborn photography, one must be adept at soothing and comforting babies, helping parents feel at ease, and cultivating a peaceful setting for the photoshoot. Essential qualities include patience, creativity, and the ability to safely and gently handle infants. The goal is to capture those irreplaceable early moments in a beautiful manner.
How can I capture high-quality photos of newborns?
Here are 12 tips to improve your newborn photography today:
- Schedule the photoshoot for when the baby is typically calmest.
- Photograph from the baby’s eye level for a personal perspective.
- Set up your camera settings in advance to avoid disruptions.
- Utilize natural light for a soft, flattering effect.
- Make sure your lenses are ready and suited for close-up shots.
- Maintain a quiet environment to keep the baby peaceful.
- Use shutter priority mode to control motion blur.
- Take advantage of continuous shooting mode or record videos to capture fleeting expressions and movements.
What camera settings are recommended for newborn photography?
For crisp images of newborns, set your shutter speed to around 1/200. Use an aperture of f/4 or lower for solo baby portraits to achieve a soft background, and f/8 when taking group photos to keep everyone in focus.
Is it challenging to be a newborn photographer?
Being a newborn photographer is indeed challenging, as it involves working with very delicate subjects. Safety is paramount in the newborn photography community. It’s crucial to be knowledgeable about how to safely pose babies in the adorable positions often seen on social media.
