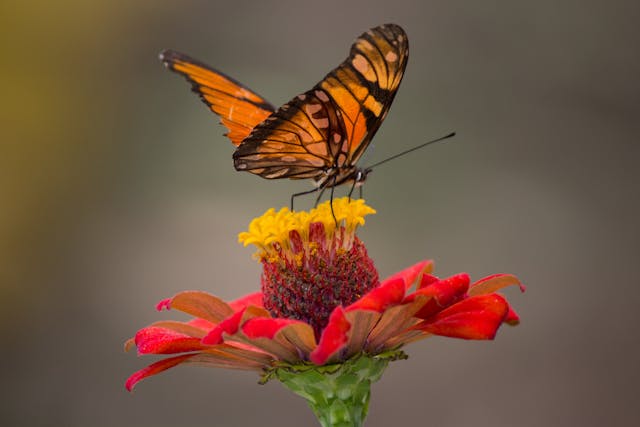
Macro photography is a mesmerizing art form that turns the minute details of small subjects, such as insects, flowers, and everyday objects, into stunningly large images, revealing intricacies invisible to the naked eye. It requires a mastery over camera settings, lighting techniques, and the use of specific photography equipment like macro lenses and extension tubes to achieve life-size magnification or greater, making subjects appear as large as, or larger than, the camera’s sensor. This unique style of photography, which can be practiced in both studio and outdoor settings, opens up a world of creative opportunities.
This comprehensive guide will explore the essential aspects of macro photography, from understanding the importance of magnification and choosing the right equipment, to mastering focus for sharp, detailed close-up shots. Additionally, it will cover lighting techniques tailored for macro photography, effective composition and framing strategies, and tips for working with live subjects and various environments. Finally, the guide will delve into the post-processing techniques that can enhance the stunning details captured in your macro shots, offering creative ideas to push the boundaries of this captivating genre.
Understanding Magnification in Macro Photography
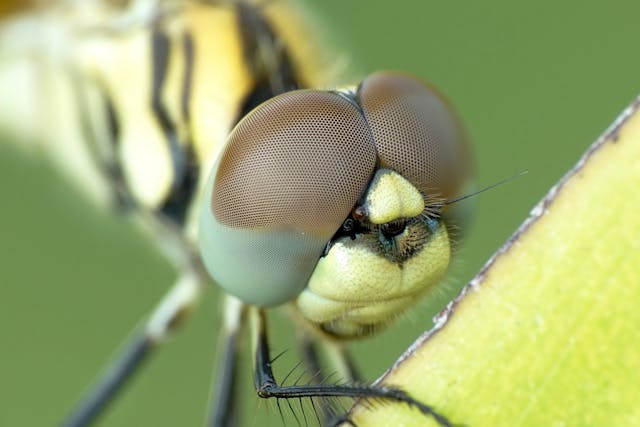
In the fascinating world of macro photography, understanding magnification is akin to unlocking a secret door to a realm where the minutiae of our world become the stars of the show. Here’s a breakdown to simplify this concept:
What is Magnification?
Magnification in macro photography refers to how much larger a subject appears on your camera’s sensor compared to its actual size in real life. Imagine a tiny ant that’s barely a few millimeters long. Through the magic of macro photography, this ant can fill your entire frame, appearing larger than life. This is all thanks to magnification, which is essentially the relationship between the subject’s projection on the imaging sensor and the subject’s actual size.
Key Factors Influencing Magnification:
- Lens Capability: A ‘true’ macro lens boasts a magnification ratio of 1:1 or higher, meaning it can project subjects onto the camera sensor at their actual size or larger.
- Subject Distance: The closer you are to the subject, the higher the magnification. This is why macro photographers often find themselves getting up close and personal with their subjects.
- Sensor Size: While the sensor size doesn’t alter magnification, it does affect how the magnified image appears. A larger sensor can capture more of the magnified subject, whereas a smaller sensor might crop it, creating a different composition.
Calculating Magnification:
To determine the magnification ratio, divide the length of the image on the image sensor by the actual size of the subject. This ratio is crucial as it indicates how large the subject appears on the camera sensor compared to its actual size. For instance, a ratio of 1:1 means the subject is projected onto the sensor at its true size. Higher ratios, like 2:1, indicate the subject appears twice its size on the sensor, offering an even closer look into the microscopic world.
Understanding magnification is not just academic; it has practical implications for macro photographers. It influences lens choice, dictates how close you need to be to your subject, and plays a significant role in the depth of field, which can be quite shallow at high magnifications. This makes achieving sharp, focused images a delightful challenge that requires a blend of the right equipment, technique, and a bit of patience.
Choosing the Right Equipment
Choosing the right equipment for macro photography is a critical step in capturing those stunning close-up shots. Here’s a breakdown to help you make informed decisions:
Lenses:
- Dedicated Macro Lenses: For studio macro photography, consider lenses like the Tamron SP 90mm F/2.8, Canon EF 100mm f/2.8L Macro IS, or Sigma Macro 105mm f/2.8 for their ability to achieve life-size magnification.
- Alternatives: If you’re not ready to invest in a dedicated macro lens, starting with macro filters, reverse ring adapters, or extension tubes can be a cost-effective way to explore macro photography 7. However, be aware that the image quality may not match that of a dedicated macro lens.
- Focus on Features: Look for lenses with a good working distance to avoid blocking natural light or disturbing live subjects. Decide between manual focus versus autofocus lenses, and check if the lens has electronic contacts for ease of use.
Camera Bodies:
- Accessories:
- Stability Tools: Sandbags, studio stands, or tabletop tripods can provide the necessary stability in challenging environments.
- Focusing Rails: Tools like the Manfrotto 454 Micrometric Positioning Sliding Plate or NISI Focusing Rail are invaluable for ensuring precise focusing, a critical aspect of macro photography.
- Lighting: External macro ring flashes, diffusers, or macro twin lights can help achieve even, shadow-free lighting, especially in challenging environments.
- DSLRs vs. Mirrorless: Both DSLRs and mirrorless cameras are suitable for macro photography. Mirrorless cameras are particularly recommended due to features like focus peaking and bright viewfinders.
- Sensor Size: While full-frame cameras offer certain advantages, crop-sensor cameras can also be excellent for macro photography due to their higher pixel density, which can reveal more detail at high magnifications.
- Key Features: Good autofocus, low-light performance, and vibration reduction are beneficial features to look for in a camera body used for macro photography.
Remember, every piece of equipment plays a role in the outcome of your macro photography endeavors. While the lens is crucial for capturing those intricate details, the camera body and accessories enhance the overall shooting experience, allowing you to focus on creativity and precision.
Mastering Focus for Sharp Images

Mastering focus in macro photography is crucial for capturing sharp, detailed images. Here are some strategies to ensure your close-up shots are as sharp as they can be:
Stabilizing Your Camera and Yourself
- Tripod Use: Always use a tripod to eliminate any camera shake, which becomes more pronounced in close-up photography 6 26. For added stability, especially when outdoors, consider using wind breaks and plamps to prevent movement of lightweight subjects.
- Body Positioning: Hold the camera body with your right hand and support the lens with your left. Bend your knees slightly, tuck in your elbows, and, if possible, lean against a stable object like a wall or tree. This stance further reduces the chances of camera shake.
- Alternative Supports: If a tripod isn’t available, placing your camera against the ground or another stable surface can also help in reducing camera shake. In situations where you’re shooting handheld, use burst mode to increase the likelihood of capturing a sharp image, as the later shots in a burst are less affected by shake.
Focusing Techniques
- Manual Focus: Switch to manual focus for greater control, especially at high magnifications where autofocus may struggle due to the shallow depth of field 8 22. Use the camera’s live view mode and zoom in on your subject to achieve critical focus, and consider enabling focus peaking to highlight areas in focus.
- Focus Stacking: For subjects with intricate details, utilize focus stacking. This technique involves taking multiple shots at different focal depths and combining them in post-processing to extend the depth of field, ensuring the entire subject is in sharp focus.
- Pre-focusing and Shutter Speeds: When dealing with moving subjects outdoors, pre-focus on the area where you expect the subject to be and use fast shutter speeds (1/125s or faster) to minimize blur caused by movement.
Adjusting Camera Settings for Optimal Sharpness
- Aperture and ISO: Use smaller apertures (f/11 to f/22) to increase the depth of field, making more of your subject in focus. However, be mindful that smaller apertures reduce the amount of light reaching the sensor, so adjust the ISO accordingly to maintain image quality. Keep ISO as low as possible to minimize noise.
- Image Stabilization: If your camera or lens has image stabilization, make sure it’s enabled to further reduce the effects of camera shake.
By implementing these strategies, photographers can overcome the challenges of achieving sharp focus in macro photography, ensuring that every detail of their tiny subjects is captured with clarity and precision.
Lighting Techniques for Macro Photography
In macro photography, lighting is a pivotal element that can dramatically transform the appearance and mood of your close-up shots. Let’s delve into some effective lighting techniques:
Diffusing Daylight and Using Flash:
- To soften harsh sunlight, diffusion is key. Materials like tissue paper or a translucent diffuser can scatter the light, reducing harsh shadows and reflections, creating beautifully toned images.
- Flash lighting, both off-camera speedlights and macro ring lights, offers the flexibility to adjust the light intensity and direction. This is crucial for achieving greater depth of field by allowing the use of smaller apertures. It’s also invaluable for freezing motion, particularly useful when photographing moving subjects like insects.
Balancing Natural and Artificial Light:
- When using flash as fill light, the goal is to illuminate the shadows without overpowering the natural light. This balance is essential for maintaining a natural appearance in your macro shots.
- In scenarios where the background is distant, avoid relying solely on flash to prevent an unnaturally dark backdrop. Instead, blend flash with ambient light or use continuous lighting to achieve a more cohesive look.
Creative Techniques and Equipment:
- Backlighting and Colored Lighting: Positioning the light source behind the subject can highlight its shape and texture, adding a dramatic flair. Additionally, applying gels or color filters to your lighting equipment can introduce vibrant, eye-catching hues to your macro photographs.
- Reflectors and Continuous Lighting: For beginners, continuous lighting allows for real-time adjustments and is especially beneficial for macro videography. Reflectors can redirect natural light, filling in shadows and enhancing details. Compact LED macro ring lights or foldable diffusers are practical tools for on-the-go photographers, providing easy subject illumination and light diffusion.
By mastering these lighting techniques and experimenting with different equipment, you can significantly improve the quality of your macro photography, bringing out the textures, colors, and details of your subjects in stunning clarity.
Composition and Framing
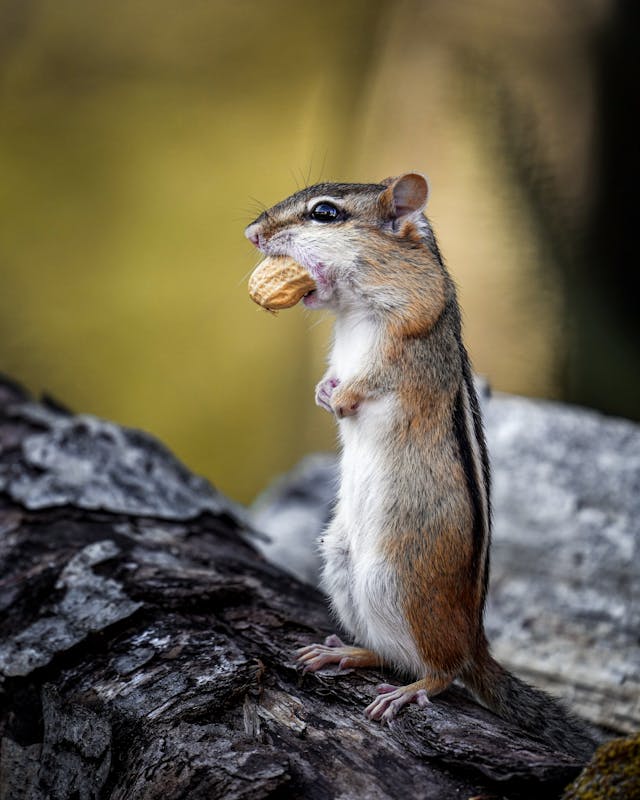
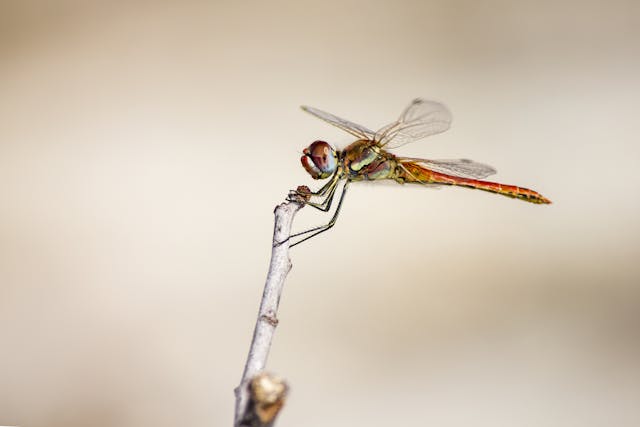
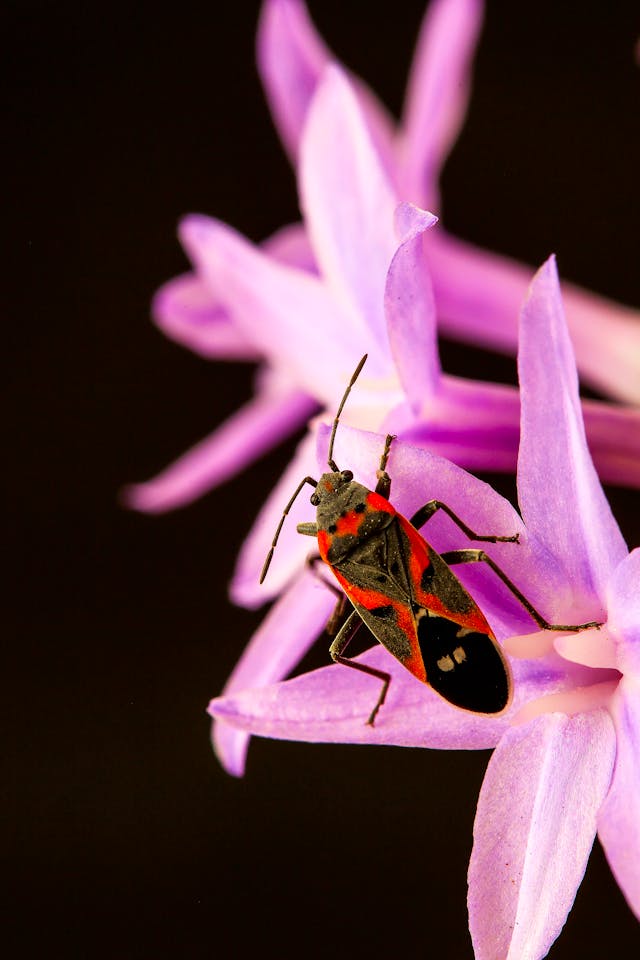
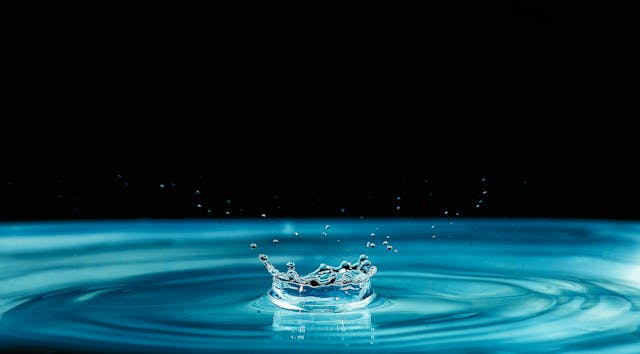
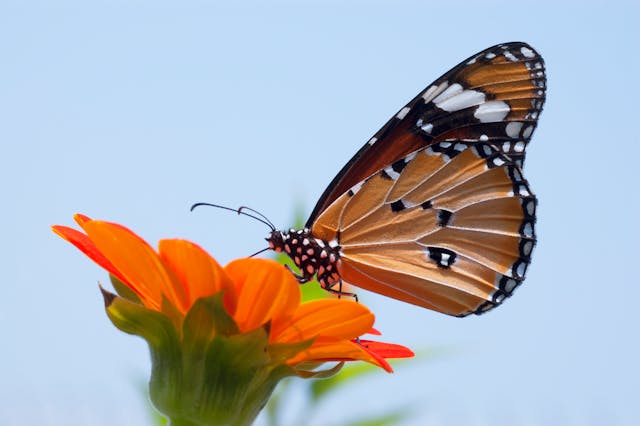
In macro photography, the way you frame and compose your shot can make a world of difference in highlighting the beauty and detail of your subject. Here are some guidelines to enhance your composition and framing:
Rule of Thirds and Leading Lines:
- Rule of Thirds: Position your main subject along one of the imaginary lines that divide your frame into thirds, both horizontally and vertically. This creates a more balanced and engaging image.
- Leading Lines: Use natural lines in your composition, such as stems or branches, to guide the viewer’s eye towards your main subject. These lines should ideally point toward or frame your subject for maximum impact.
Cropping and Background Considerations:
- Cropping: To emphasize your subject and remove any distracting elements, crop your image either during the shoot or in post-production. Be mindful of the aspect ratio and how it affects the magnification of your subject. Remember, tight cropping can help focus on the subject, but ensure you leave enough lead room considering the subject’s direction of movement or gaze.
- Background: The background should complement and not compete with your subject. A supportive background is generally uniform and doesn’t distract, enhancing the main subject’s prominence in the frame.
Creative Composition Tips:
- Centering the Subject: For subjects looking directly at the camera, placing them in the center can create a powerful impact. However, don’t be afraid to break the rules if your subject has enough compositional interest. Sometimes, the inherent beauty or uniqueness of the subject allows for more flexibility in composition.
- Negative Space: Utilize empty space wisely to draw attention back to the main subject. This technique can make your subject more powerful and give your image a clean, uncluttered look.
- One Main Subject: Ensure your macro photo has one main subject that serves as the anchor of the image. Position this subject carefully using the rule of thirds, leading lines, and considering the amount of negative space to draw the viewer’s eye effectively.
By applying these principles thoughtfully, you can create macro photographs that not only showcase the minute details of your subjects but also convey a sense of artistry and intention. Remember, the best compositions often come from experimenting with different framing and angles, so don’t hesitate to explore various approaches to find what works best for your subject and your artistic vision.
Working with Live Subjects
When embarking on the journey of macro photography with live subjects, it’s essential to be well-prepared for the unpredictability and movement these subjects bring to the table. Here’s a guide to tackling these challenges with grace and patience:
Preparation and Patience:
- Be ready for the unexpected. Live subjects, especially insects, are unpredictable and can move swiftly.
- Patience is not just a virtue but a necessity. You might spend hours or even days to capture that perfect shot.
- Understand your subject’s behavior. This knowledge can significantly enhance your ability to predict movements and capture stunning images.
Techniques and Timing:
- Handheld vs. Tripod: While tripods are great for stability, handheld shooting offers the flexibility needed to follow moving subjects in their natural habitats.
- Working Distance: Keep an eye on the space between your lens and the subject. A comfortable working distance ensures you don’t scare away your tiny models.
- Timing is Everything: Early morning or late at night can be the best times to find your subjects. Early mornings are great for slower, dew-covered subjects, while nights unveil a whole new world of macro photography subjects like moths and spiders.
- Location and Learning:
- Finding Your Subjects: Explore wetlands, meadows, botanical gardens, and local parks. These locations are teeming with potential macro subjects.
- Learn About the Plants: The relationship between insects and their environment is crucial. Paying attention to this can lead you to find new subjects.
- Bring the Bugs to You: Consider planting wildflower seeds around your home to attract a variety of insects for your photography projects.
By integrating these strategies into your macro photography practice, you not only increase your chances of capturing the beauty of live subjects but also enrich your experience with the natural world. Remember, the key to success in macro photography, especially with live subjects, lies in understanding their behavior, being patient, and always being ready to adapt to their movements.
Macro Photography in Different Environments
Exploring the world of macro photography across different environments presents its own set of challenges and opportunities. Here’s a closer look at how to navigate these varied settings:
Outdoor Adventures:
- Light and Weather: Outdoor macro photography is a game of patience and adaptability, especially when dealing with the unpredictability of natural light and weather conditions. Whether it’s managing the harsh midday sun or utilizing the golden hour for softer lighting, understanding how to work with available light is key.
- Dealing with Elements: Wind, rain, and harsh sunlight can introduce challenges but also unique photographic opportunities. Using a diffuser to soften direct sunlight, or capturing the dynamic movement of subjects in the wind, requires a creative approach and sometimes, a bit of improvisation.
Extreme Conditions:
- Specialized Gear: Venturing into extreme environments, such as underwater realms or icy landscapes, demands specialized equipment. Waterproof housings for underwater photography or insulated camera bags for cold temperatures ensure your gear remains protected.
- Technique Adaptation: Techniques must also be adapted. For instance, underwater macro photography might involve adjusting white balance to counteract the blue tint of the water, while cold environments might require keeping batteries warm to maintain charge.
Unique Environments:
- Underwater Miniatures: The tiny world beneath the water’s surface opens up with the use of a waterproof camera or housing. Here, the challenge lies in maneuvering and focusing in a fluid environment, often requiring a steady hand and patience.
- Museum Discoveries: Museums provide a controlled environment to capture macro shots of artifacts, sculptures, and more. Low light conditions demand a steady hand or a tripod, and always check museum policies on photography before shooting.
- Natural Habitats: Capturing subjects in their natural setting adds a layer of context and storytelling to macro shots. Researching the area and understanding the best times to find specific insects or subjects can lead to rewarding shots that feel alive and connected to their environment.
By embracing the unique challenges and opportunities each environment presents, macro photographers can expand their portfolio with diverse and captivating images. Whether it’s adapting to the whims of nature outdoors, diving into underwater photography, or exploring the quiet corners of a museum, each setting offers a chance to refine techniques and capture the unseen beauty of the world in macro.
Post-Processing Macro Shots
Post-processing is like the magic wand that can transform your macro shots from good to breathtaking. Here’s how to wield this magic effectively:
Adjustments for a Perfect Finish:
- Exposure and Tone: Dive into Lightroom’s ‘Tone’ settings under the Basic Panel to fine-tune your image’s exposure, bringing out the best in your macro shots.
- Color Balance: Adjust the color temperature and tint in Lightroom for that perfect hue. Whether you aim for accuracy or creative flair, these adjustments can make your colors pop or give your image a whole new mood.
- Sharpen and Blur: Use Photoshop’s Smart Sharpen to bring out the crisp details of your subject 41. Conversely, Smart Blur can help minimize noise while keeping the essential details intact, perfect for those high ISO shots.
Localized Adjustments for Impact:
- Radial Gradient Tool: Lightroom’s Radial Gradient tool lets you highlight your subject or a part of your image, drawing the viewer’s eye exactly where you want it.
- Noise Reduction: Tackle those pesky grains from high ISO shots with built-in noise reduction tools in raw packages or dedicated programs.
Creative Post-Processing Techniques:
- Vibrance/Saturation: Breathe life into your macro shots with Photoshop’s Vibrance/Saturation adjustment. Amp up the colors to make your subject stand out even more.
- S Curves for Contrast: Add depth and dimension to your images with Photoshop’s S curves. This technique allows you to highlight the important parts of your image while subtly darkening the less important ones, adding a dramatic contrast that can make your macro shots pop.
- Focus Stacking for Depth: Combine multiple images taken at different focus distances using software like Photoshop. This technique extends the depth of field, ensuring every detail of your subject is in sharp focus.
Remember, while post-processing can significantly enhance your macro photography, it’s crucial to maintain the natural beauty of your shots. Over-editing can detract from the subject’s inherent allure. Always aim for a balance that enhances rather than overwhelms. And don’t forget, experimenting with these post-processing techniques can unlock new creative potentials in your macro photography journey.
Creative Macro Photography Ideas
Exploring the world of macro photography opens up endless possibilities for creativity. Here are some ideas to spark your imagination and encourage you to see the ordinary in extraordinary ways:
Indoor Marvels:
- Kitchen Wonders: Dive into your kitchen for everyday items that can transform into intriguing subjects. For instance, the vibrant colors and patterns of fruits and vegetables, or the dynamic dance of oil and water can produce mesmerizing images.
- Personal Items: Look closer at objects like vintage cutlery, jewelry, or even the intricate designs on a CD when sprinkled with water droplets. These items, often overlooked, can offer fascinating details when viewed up close.
- Art Supplies and Toys: A simple pencil or toys can become the stars of your shoot, providing a playground for experimenting with composition and lighting.
Outdoor Adventures:
- Creative Techniques:
- Light and Shadow Play: Utilize lighting techniques to enhance textures and shapes. For instance, backlighting can reveal the intricate patterns of feathers or the translucent beauty of petals and leaves.
- Abstract Art: Create abstract compositions using materials like foam and bubbles, or by capturing the effects of fizzy drinks. These setups allow for playful exploration of form and color.
- Homemade Setups: Construct your own scenes with a homemade backdrop or by dropping objects into water to capture splashes. These controlled environments enable you to experiment with different elements and effects, pushing the boundaries of macro photography.
- Nature’s Palette: The natural world is a treasure trove of macro subjects. Capture the delicate structure of a snowflake, the geometric beauty of leaf veins, or the vivid colors of wild berries. Each element, from the smallest pebble to the grandeur of mushroom villages, tells a unique story.
- Living Subjects: Approach the tiny inhabitants of the outdoors with curiosity. Document the journey of a seed, or see the world from an insect’s perspective. The interaction between these live subjects and their environment offers dynamic scenes ripe for capture.
- Water Wonders: Experiment with capturing raindrop ripples or the morning dew on grass. These transient moments, when water interacts with its surroundings, provide fleeting beauty that macro photography can preserve forever.
Each of these ideas encourages photographers to look beyond the obvious and find beauty in the details. Whether indoors or outdoors, the potential subjects for macro photography are limitless. It’s all about observing your surroundings with a curious eye and letting your creativity lead the way.
Final Remarks
Delving into the world of macro photography unveils a spectrum of possibilities, allowing the tiniest details of our surroundings to shine in the limelight. From choosing the right equipment and mastering focus, to exploring lighting techniques and the art of composition, this guide has journeyed through the essential elements that make macro photography a thrilling venture. Emphasizing the significance of patience, creativity, and a deep understanding of our subjects, we have uncovered the intricate beauty that lies in the minutia, encouraging photographers to see beyond the visible and capture the world in its grandeur of details.
The discussion on working with live subjects and navigating the diverse environments highlights not only the technical prowess required but also the adaptability and respect for nature imperative in macro photography. As we conclude, let this guide serve as a beacon for both novices and seasoned photographers looking to delve deeper into this captivating genre. The encouragement to experiment, combined with a respectful approach towards our tiny subjects and their habitats, paves the way for not just stunning imagery but also a profound connection with the natural world around us.
FAQs
What exactly is macro photography? Macro photography is a form of extreme close-up photography, primarily focused on photographing very small subjects such as insects, with the subject appearing larger than its actual size in the resulting image. This technique can also encompass the broader art of capturing detailed shots where the subject is magnified.
How does depth of field affect macro photography? In macro photography, depth of field refers to the portion of the image that appears sharp and in focus. Unlike landscape photography, where the entire scene from the foreground to the background is typically in focus, macro photography often features a very shallow depth of field, highlighting the subject while the rest of the image may remain out of focus.
Can you tell me about Mike Moats? Mike Moats is a distinguished macro photographer based in Sterling Heights, Michigan, who has garnered international acclaim and numerous awards for his work in the field of macro photography.
What are the different types of macro lenses available? Macro photography can be performed using different types of lenses, categorized into three main groups: short macro lenses with focal lengths of 35 to 65 mm, standard macro lenses with focal lengths between 90 and 105 mm, and telephoto macro lenses. Specific examples of macro lenses include the Canon EF 100mm, Canon RF 100mm, and Sigma Macro 105mm. Each type offers varying benefits for close-up photography.

